Installing monitoring cameras is one of the best ways to protect your property, but many people don’t know how to install security cameras. The process might seem intimidating at first, but with the right guidance, it’s easier than you think. However, with the right instructions, it’s easier than you think to set up a reliable security system.
In this guide, we’ll show you each step of the installation process. From choosing the right cameras for your specific needs to testing and optimizing your system once it’s set up. We’ll explain everything you need to make sure your monitoring cameras are set up and working properly.
Things to consider before starting an installation
Before you start installing your closed-circuit cameras, keep these practical factors in mind to avoid setbacks later.
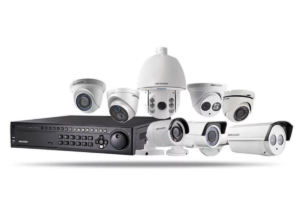
- Camera Type: Decide whether you need an indoor or outdoor video recorder. Outdoor cameras should be weatherproof, while indoor video recorders are smaller and perfect for monitoring spaces inside your home or business. If you have any confusion, you can read this guide on how to choose a security system in NYC. It will help you understand the type of CCTV needed for your property.
- Wired vs Wireless: If you want stable, uninterrupted footage, then go for wired camera systems. For easier installation and flexibility, wireless cameras are great, but check that your Wi-Fi can handle the video feed.
- Power Source: Wired video recorder needs a nearby power outlet or PoE (Power over Ethernet). Wireless cameras may be battery-powered or need a plug, so make sure you have accessible outlets or batteries ready.
- Wi-Fi Strength: For wireless CCTV, test your Wi-Fi signal at the installation spot. Weak Wi-Fi can cause dropped connections, so consider a Wi-Fi extender if needed.
- Permissions and Placement: If you’re renting, get permission to install cameras and check the lease. Also, make sure the cameras don’t invade privacy, especially in shared spaces or when pointing toward neighbors.
- Storage and Recording: Decide where to store footage. Cloud storage is convenient, but DVR or NVR systems allow you to keep recordings locally, without recurring fees.
Step-by-Step Guide on How to Install Security Cameras
With the right approach, you can easily secure your space in no time. From choosing where to place your CCTVs to connecting everything, we’ll take it one step at a time. Let’s go through each step of the process:
Step 1: Choose Your Camera Placement
Proper video recorder placement is the first step in setting up a reliable security system. Getting this right from the start saves you time, effort, and potential headaches later. Here’s how to approach it:
- Cover Entry Points: Start by thinking about where an intruder is most likely to enter your home or business. For a home security camera installation, the obvious spots are the front door, back door, and windows. These are the primary access points. If your property has a side gate or garage, these are important too.
- Outdoor Areas: If you’re installing outdoor cameras, focus on high-traffic areas like your driveway, backyard, or porch. These are spots that tend to be less visible from the street, making them more vulnerable to break-ins. For cameras outside, make sure they’re weatherproof and designed to handle outdoor conditions like rain, snow, or extreme temperatures.
- Interior Spaces: Inside, look at places with a lot of foot traffic or valuable items that need protecting. Living rooms, hallways, and areas near electronics or cash registers in a business are all prime spots for cameras. Consider placing a camera near your front entryway inside, so you can get a good shot of anyone entering your home.
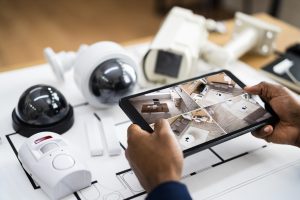
Step 2: Check the camera view before mounting
Before securing your cameras in place, it’s important to test the placement to make sure everything is covered as you need. Hold the camera in the spot where you intend to mount it and check the live feed on your phone or monitor. This lets you see exactly what the camera will capture.
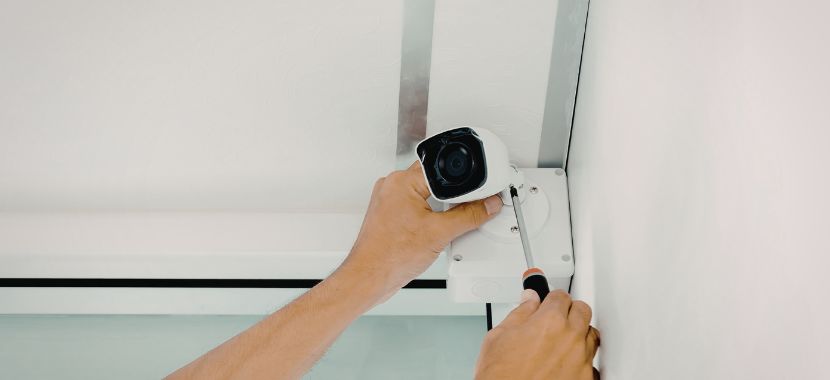
Step 3: Mount the Camera
Now that you’ve decided on the camera’s placement, it’s time to mount it. Begin by marking where you’ll drill the holes for the mounting bracket, ensuring the spots are level. If you’re working with brick or concrete, use wall anchors to keep everything secure. For wooden surfaces, you can use screws directly.
Once the holes are drilled, attach the mounting bracket securely, then mount the surveillance device. Tighten everything up, making sure the camera is stable and won’t shift over time.
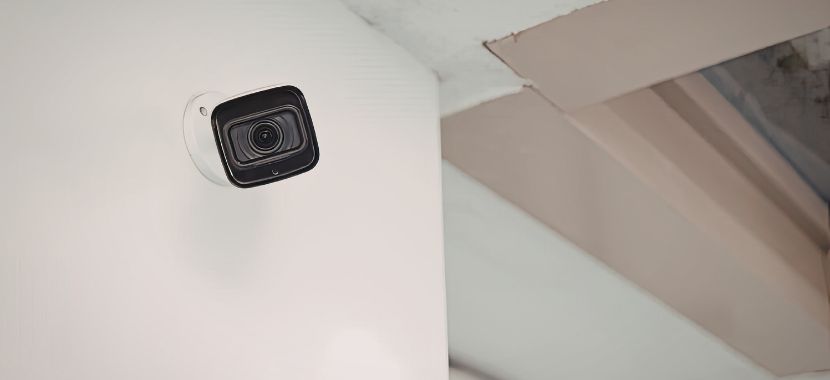
For outdoor cameras, position them about 8–10 feet high. This height helps keep the camera out of reach while still capturing clear images of faces and important details. For more guidance on the best places to install your cameras inside and outside your home, take a look at our guide on where to Place Security Cameras.
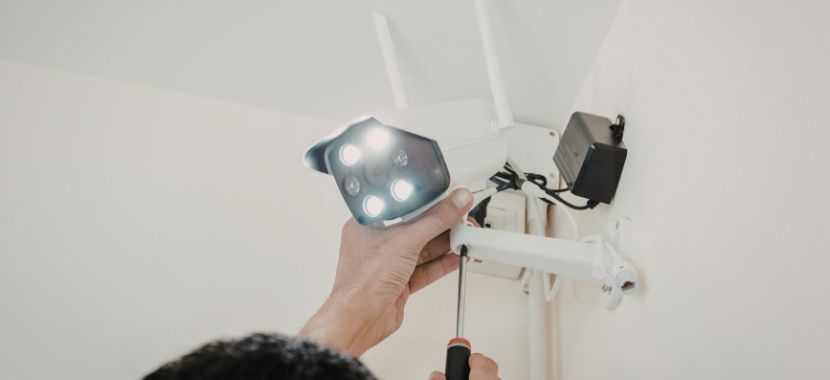
Step 4: Connect Power and Network Cables
After mounting your surveillance device, it’s time to connect it to power and your network cables. For wired cameras, run the Ethernet or coaxial cables from the camera to your NVR (Network Video Recorder) or DVR (Digital Video Recorder). Ensure the cables are securely fastened along walls or ceilings to prevent damage. For outdoor cameras, make sure the cables are properly weatherproofed to avoid damage from the elements.
For wireless cameras, plug the camera into a power outlet and follow the instructions in the app to connect the camera to your Wi-Fi network. Make sure the camera is within range of your router to ensure a strong and stable connection.
Step 5: Set Up the Camera System and App
With your camera securely mounted and connected to power and the network, it’s time to set up the system and connect it to your phone or monitoring device.
For wired cameras, you’ll need to connect the camera to your NVR (Network Video Recorder) or DVR (Digital Video Recorder), if you haven’t already. Follow the instructions in the camera’s manual to add the camera to the system. Ensure the NVR/DVR is properly configured to record and store footage.
For wireless cameras, download the camera’s app (if you haven’t already) and open it on your phone or tablet. Follow the setup instructions to connect the camera to your Wi-Fi network. You’ll usually need to scan a QR code or enter a pairing code, so make sure your camera is powered on and within range of your router.
Once connected, you can name each camera by its location (e.g., “Front Door,” “Backyard”) to keep track of them easily. After the cameras are added to the system, check to ensure that the live feed is working properly.
Step 6: Test Your System
Now that your cameras are all set up, it’s time for the final check. This is where you make sure everything works as it should. Start by checking the live feed from each device. You want to make sure the video looks clear and covers the areas you need, like your front door, driveway, or any spots you’re concerned about. If you spot any blind spots, now’s the time to make small adjustments to the camera angles.
Once that’s done, go back and check some recorded footage to make sure everything is being captured correctly. Test the footage in both daylight and at night. If you’ve got a mobile app or remote access, give it a try. Open the app and make sure you can see the live feed from wherever you are—whether you’re at home or out and about.
Now you know how to set up the camera and are curious about the costs? You can find a detailed breakdown of typical installation prices in our guide on CCTV Installation Costs. It will help you to plan your budget.
Troubleshooting Common Security Camera Installation Issues
Surveillance camera setup can be hard, but most issues are easy to fix. From power problems to connection issues or poor video quality, there are simple solutions to get things back on track. Let’s go through some common problems and how to tackle them.
1. Camera Won’t Turn On: Double-check the power cable and make sure it’s plugged in properly; if it’s battery-powered, replace the batteries or recharge them.
2. Poor Video Quality or No Image: A blurry or black screen can usually be fixed by checking your connection. For Wi-Fi cameras, ensure you have a strong signal. If it’s wired, check that cables are tightly secured and free from visible wear or damage.
3. Camera Disconnects from the Wi-Fi: Wi-Fi issues are common, especially if your camera is placed far from the router. Move the camera closer or consider investing in a Wi-Fi extender to boost the signal and improve connection stability.
4. Motion Detection Not Working Properly: If your camera isn’t detecting motion accurately, then adjust the sensitivity settings so it only picks up bigger movements, and make sure nothing is blocking the camera’s view, like trees or furniture.
5. Camera Positioning and Blind Spots: Sometimes, a camera simply needs a slight repositioning to capture more area. If you still have blind spots, adding another camera can provide better coverage and help monitor all entry points effectively.
6. Camera Freezing or Lagging: Slow Wi-Fi? Try disconnecting other devices on the network, or simply restart your camera to clear any bugs.
Final Thoughts
Now you know exactly what you need before installing your closed-circuit cameras and the steps to get everything up and running. Take your time to ensure everything’s working properly. That little extra effort will make all the difference in having a system that works just the way you want.
If you’d rather skip the hassle of installation or want to ensure everything is set up perfectly, you can contact City Smart to get the best security camera installation services in NYC.
Frequently Asked Questions
1. How to install security cameras at home?
To set up a camera system at home, start by selecting the right cameras (wired or wireless) based on your needs. Here’s a simple breakdown of how to proceed:
- Start by selecting the right cameras (wired or wireless) based on your needs.
- Mount the cameras at key entry points, such as doors, windows, and driveways.
- Make sure your cameras are positioned at least 8 feet high for optimal coverage.
- For wired cameras, connect them to a DVR or central hub, and for wireless cameras, ensure they’re connected to your Wi-Fi.
- Finally, test the cameras to make sure the video feed is clear and stable.
2. How to install a CCTV camera in a mobile?
To install CCTV on your mobile, download the corresponding camera app from your app store. Once installed, open the app and follow the instructions to connect the CCTV camera system, usually via scanning a QR code or entering device credentials. Ensure that your mobile and CCTV systems are connected to the same Wi-Fi network. After syncing, you can access live feeds, recordings, and even adjust settings through the app from anywhere.
3. How to install a wireless security camera system at home?
Here’s how to set up a home security camera:
- Select the camera locations: Choose spots with a strong Wi-Fi signal and where they can cover vulnerable areas.
- Mount the cameras securely: Install the cameras in the chosen spots, ensuring they have access to power or batteries.
- Connect the cameras to Wi-Fi: Use the system’s app to connect each camera to your home Wi-Fi.
- Test the signal strength: Make sure each camera is within range of your Wi-Fi to avoid connection issues.
- Adjust the camera angles: Ensure the cameras cover all desired areas.
4. How to install security cameras outside the home?
When you put security cams outside, you need to be extra careful to make sure they last and work well.
- Choose weatherproof cameras: Look for cameras with a high IP rating for protection against rain, snow, and dust.
- Mount under a roof or overhang: This keeps the cameras shielded from the elements.
- Use weather-resistant cables: For wired cameras, ensure cables are waterproof and properly sealed.
- Position cameras for maximum coverage: Place cameras at entry points, driveways, and places of high traffic.
- Test camera functionality in different light conditions: Check for night vision performance and clarity.
5. How to install security cameras in a rental property?
To avoid damaging the room, installing cameras in a rental property requires only minor changes. Here’s how to do it:
- Use wireless cameras: These are the easiest to install and remove without leaving marks.
- Use adhesive mounts or stands: These are perfect for renters who don’t want to make permanent alterations.
- Check with your landlord: Always ensure you have permission to install cameras before proceeding.
- Choose a removable system: Ensure the cameras can be easily uninstalled without leaving permanent damage.
6. How to install wireless security cameras?
It takes some work to set up a whole camera setup, but the steps are easy to understand.
- Choose ideal camera spots: Make sure the cameras are within range of your Wi-Fi and cover vulnerable areas.
- Mount the cameras: Position them securely, making sure they have access to power or batteries.
- Connect to Wi-Fi: Use the mobile app or software to sync each camera to your network.
- Check signal strength: Test the Wi-Fi connection to ensure there are no dead zones.
- Test camera feeds: Make sure the footage is clear, and adjust the angle if needed.
7. How to install wired security cameras?
To install wired monitoring cameras, just choose the right spots and mount the cameras. Once installed, you’ll need to run cables from each camera to a central hub or DVR.
For external installations, ensure the cables are weatherproof and sealed. Connect the cameras to the DVR or central recording device, and test the system to make sure everything is working correctly.
8. How to install home video security cameras?
For video surveillance cameras, follow these simple steps:
- Choose HD cameras: Ensure the cameras provide high-definition video quality, even in low light.
- Mount the cameras: Position the cameras in high-traffic areas like the front door, driveway, and living areas.
- Connect to the DVR or Wi-Fi: Wired cameras should connect to a DVR, while wireless cameras will sync with your home Wi-Fi.
- Adjust camera angles: Make sure the cameras cover all important areas without any blind spots.
- Test the system: Confirm the cameras are working and the footage is clear.