Sometimes it’s hard to set up cameras in New York. Thick walls can weaken Wi-Fi, and co-op rules may limit drilling. Outdoor cameras also deal with rain, snow, and glare from streetlights. But don’t worry because this Security Camera Installation Guide for NYC helps you build a setup that works for your home or business.
You’ll learn how to choose the right areas, follow building rules, pick wired or Wi-Fi cameras, set up cloud or NVR storage, and test everything. You’ll also get a quick troubleshooting checklist to fix common issues after installation.
Step-by-Step Security Camera Installation Guide for NYC
A good security camera setup starts with the right areas and the right rules. After that, you’ll choose your camera type, plan placement, set up power and storage, and test the system. This works for apartments, homes, and small businesses. Follow the steps below one by one:
Step 1 — Identify the Areas You Need to Monitor
Make a list of the places you need to keep an eye on first. In NYC, that usually means front doors, stoops, package drop spots, registers, and storage rooms. When you pick these areas first, camera placement becomes easier, and your setup covers real risks instead of random corners.
Step 2 — Check Building and Property Rules
Before you install anything, check your building rules. Many NYC landlords and co-op boards limit drilling, outdoor mounts, or cameras facing hallways.
If you make sure of what’s allowed first, then you’ll avoid complaints later, and you won’t have to move or take down cameras after they’re set up.
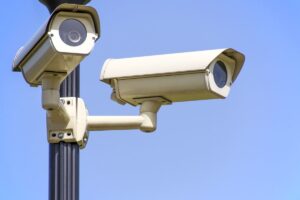
Step 3 — Choose the Right Camera System
Next, identify the kind of camera setup that will work best in your room. Wired or PoE cameras offer solid performance in NYC buildings where thick walls can weaken signals. On the other hand, Wi-Fi cameras work well in smaller homes with strong internet. Choosing the right system early helps you avoid connection problems later.
Some of the best home security cameras are available with different features for indoor and outdoor use. From there, you can pick what fits your space and budget.
Step 4 — Decide How and Where Footage Will Be Stored
Now decide where your security camera footage will be stored. The cloud storage makes it simple to listen to recordings on your phone even when you’re not there. An NVR or DVR system saves video on-site and can keep recording during internet outages.
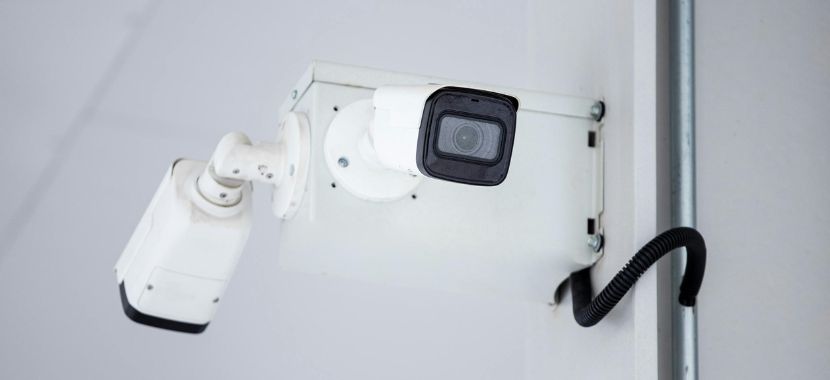
Step 5 — Plan Camera Placement and Angles
Now, plan your security camera placement and angles so that you get the actual useful footage. Start with doors, gates, and walk-up paths because these spots give you the clearest face views instead of a wide shot of the street. As you set each angle, avoid neighbor windows so that your view stays privacy-safe and focused.
Step 6 — Test Wi-Fi Signal and Lighting at Each Camera Location
Before you mount anything, check the Wi-Fi signal at each camera spot. Thick NYC walls can weaken the connection. Then test the area at night, because streetlights and headlights can cause glare. Doing this first helps you avoid dropouts and keeps your footage clear.
Step 7 — Plan Power Sources and Cable Routing
Now think about how each camera will get power and where the cables will run. Some cameras plug into an outlet, while PoE cameras use one cable for power and video. From there, plan a clean path along walls or corners so wires stay out of the way and the setup looks neat and safe.
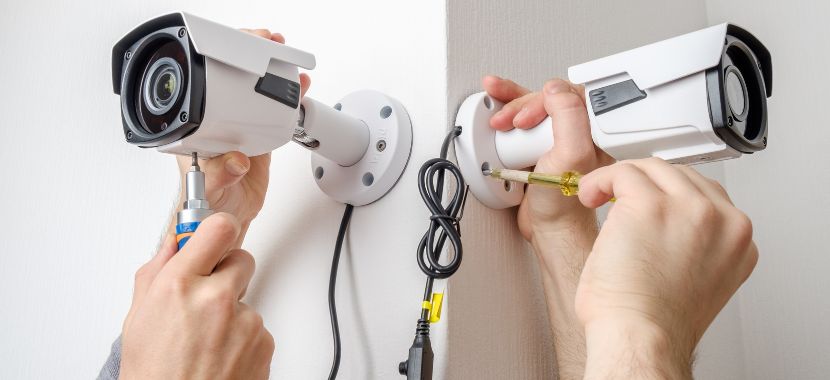
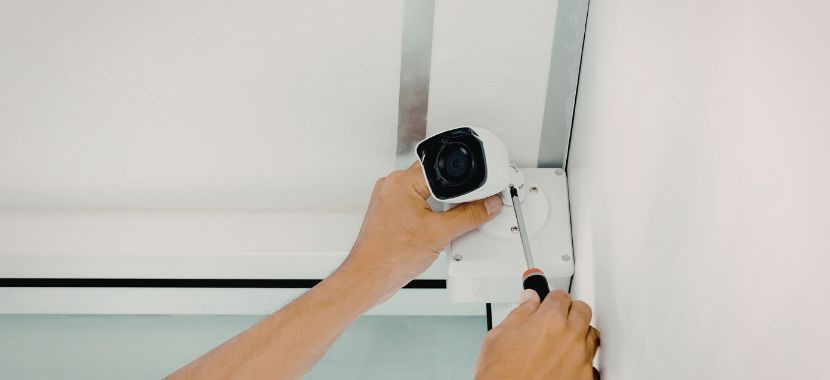
Step 8 — Mount and Secure the Cameras
Now it’s time to mount the cameras in the planned spots. Place them high enough to stay out of reach, but low enough to capture faces clearly. Always use the right anchors for drywall, brick, or concrete so the camera stays firm. For Outdoor camera installation in NYC, seal the edges and protect cables from rain and snow.
Step 9 — Connect the System and Secure Access
After mounting, connect the cameras to your app or recorder so you can see a live view right away. Once everything is online, update the firmware to keep the system stable and protected. Next, use secure passwords to protect it. One more thing to note, if it’s for a business, add user roles so only the right people can access settings and footage.
Step 10 — Configure Alerts, Recording, and Test Everything
Once the system is connected, now set your motion alerts and recording settings so they fit your space. Start by drawing motion zones around doors and entry paths, then lower sensitivity so cars and street movement don’t trigger nonstop alerts.
Then, choose how you want to record, like motion-only or 24/7, and set how many days of footage to keep. Finally, do a real test in daylight and at night by walking through the area, checking notifications make sure faces and details look clear.
After Installation: Security Camera Troubleshooting Checklist
Even after a clean install, small issues can still show up. In NYC, thick walls, crowded Wi-Fi networks, and outdoor weather can affect your footage. If anything stops working, use the checklist below to diagnose and fix common problems:
- Camera won’t turn on: You should check the outlet or PoE switch first. Then reseat the cable and power adapter because loose connections cause most startup failures.
- Camera keeps disconnecting: Always test the Wi-Fi signal at the camera spot. Thick brick walls often weaken it. Move the router, add a mesh node, or switch to wired/PoE for stability.
- Live view works, but no recordings: Confirm storage (cloud/SD/NVR) and the recording mode/schedule. Then review the recording schedule to make sure it’s active.
- Video is laggy or buffering: Lower live-stream quality/bitrate and reduce Wi-Fi load or use Ethernet backhaul.
- Night footage is washed out/blurry: Re-aim the camera away from streetlights and headlights, then clean the lens. Glare and dust can reduce clarity at night.
- Faces aren’t clear at the door: Adjust the height and angle. Always aim at face level, not above. If needed, add a closer camera for better detail.
- Too many motion alerts: Tighten motion zones around doors only. Lower sensitivity and enable person detection. This cuts false alerts from cars and pedestrians.
- No phone notifications: Enable app permissions and turn off battery optimization. Then update the app and firmware to restore alerts.
- Outdoor camera fogs/leaks: Reseal mount points, add a drip loop, and verify weather rating/placement.
- Remote viewing fails off-site: You should confirm your login, enable two-factor authentication, and check the official remote-access settings inside the app or NVR.
If you’ve tried the fixes above and the camera still shows missing recordings, black screens, or random dropouts. What Causes Video Loss in Security Cameras explains the most common reasons and what to check next.
Professional Security Camera Installation in NYC
Installing security cameras in NYC can be simple in some places and frustrating in others. One apartment may have strong Wi-Fi, while the next has thick walls that weaken the signal. Some buildings don’t allow drilling, and outdoor cameras must handle rain, snow, and streetlight glare.
That’s why many people in NYC choose professional security camera installation rather than trying to handle it on their own. A good installer helps you pick the right camera spots, so you capture faces at the door, not just a wide shot of the street. They also keep the wiring clean and safe, which matters a lot in tight NYC spaces. Thats exactly what City Smart System NYC does!
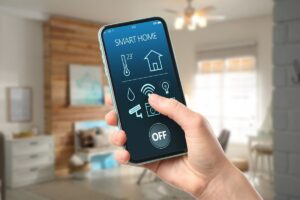
We provide indoor and outdoor security and surveillance camera installation across NYC, including Manhattan, Brooklyn, Queens, and the Bronx. We plan the setup, mount the cameras, set up cloud or NVR storage, and test everything with you. Before we leave, you can check live video and recordings from your phone.
Final Thoughts
This Security Camera Installation Guide for NYC shows one thing clearly that a good setup is not about adding more cameras. It is about placing them in the right spots and making sure they work every day. When you plan your angles, power, storage, and alerts, you get clear footage that actually helps.
Even with a solid plan, NYC installs can be tricky. Thick walls affect Wi-Fi, and outdoor cameras deal with weather and glare. Professional help keeps the setup clean, stable, and reliable. To get a clean and reliable installation from City Smart NYC, request a quote or schedule your installation.
Frequently Asked Questions
1) Where can I find a reliable outdoor security camera installation near me in NYC?
If you’re in NYC, look for installers who understand local buildings, brick walls, and co-op rules. Outdoor cameras need proper mounting, weatherproof sealing, and safe cable routing to handle rain, snow, and heat. Working with an experienced local installer like City Smart NYC can help you to avoid weak signals, loose mounts, or water damage later.
2) How much does security camera installation cost in NYC?
The cost of security camera installation is normally between $300 and $2,000. This cost depends on the number of cameras, wiring type, and building layout. A small apartment with 2–3 Wi-Fi cameras may cost less, while wired or PoE systems for homes or businesses cost more because of cable runs and setup time.
3) When should I hire a professional instead of installing cameras myself?
DIY works for simple Wi-Fi setups in small spaces. But if you need outdoor cameras, PoE wiring, drilling through brick, or multiple cameras, a professional install is usually safer and more reliable.
4) Do I need permission to install security cameras in an NYC apartment or co-op?
Yes. In many cases, NYC landlords and co-op boards often limit drilling, outdoor mounts, or cameras facing shared hallways. So it’s best to check the rules first so that you don’t have to move or remove cameras later.
5) Are wired/PoE or Wi-Fi security cameras better for NYC buildings?
Wired or PoE cameras usually perform better in NYC, as the thick walls of this city can weaken Wi-Fi signals and cause dropouts. Wi-Fi works well in small spaces with strong internet, but wired systems are usually more stable and reliable.
6) Where should I place security cameras for the clearest footage?
You should always try to focus on doors, entry paths, and package areas first. These spots capture clear faces instead of wide street views. For businesses, add registers and storage rooms too. Remember, keep cameras away from neighbor windows to protect privacy.